In this article, we are going to see how to make a realtime GPS tracker device, which you can track from anywhere in the world, using Raspberry Pi, Python, and Javascript. At the end our client-side will look something like this:
Hardware Part:
So here I am going to use Raspberry Pi 3B+, but you can also use Raspberry Pi zero as in that case the size of the device will be much smaller and the procedure is the same. Also, we need to use a GPS module with Raspberry Pi. I am going to use Neo 6M GPS module as it’s quite cheap and also very much accurate.
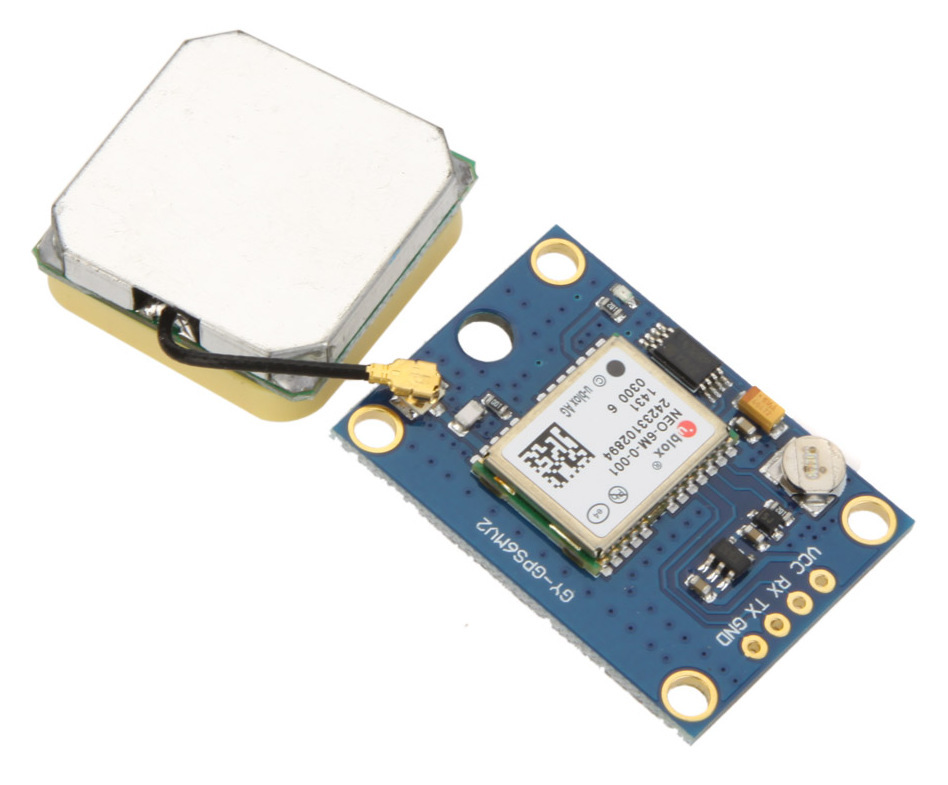
But you are free to use any GPS module. Now if you don’t know how to use a GPS module with Raspberry Pi, you can visit my previous blog, where I have shown how to use Neo 6M GPS module with Raspberry Pi and also how to write a python code to access the GPS data. Here the link of that blog Use Neo 6M GPS Module with Raspberry Pi and Python. Also you can watch this video where I have practically shown how to do this:
So make sure you have visited that blog or watched this video before proceeding further.
So after taking all those steps our hardware is ready and if we power it on, it will look something like this:
Now let’s make a realtime GPS tracker using this hardware setup:
Software Part:
So here we have to do two things:
a. Making a webpage, where the live location of the device will be shown.
b. Sending the GPS data from Raspberry Pi to the webpage.
a. Making a Realtime geolocation tracking webpage:
So let’s make the webpage first. So here we will use a API called PubNub, which is used to deliver realtime data. Here we will use this to send our GPS data from Raspberry Pi to our webpage. We are using this API for three reasons:
a. This will make things easier for beginners as we don’t have to deal with things like sockets, public IP, etc.
b. It’s free until you scale.
c. Most importantly you don’t have upload your webpage on any server (No need to pay money for a server).
Now here’s the code for our tracking webpage:
<!doctype html>
<html>
  <head>
    <title>Realtime GPS Tracker</title>
    <script src="https://cdn.pubnub.com/sdk/javascript/pubnub.4.19.0.min.js"></script>
    <link rel="stylesheet" href="map.css">
    <link rel="stylesheet" href="https://maxcdn.bootstrapcdn.com/bootstrap/4.0.0/css/bootstrap.min.css" integrity="sha384-Gn5384xqQ1aoWXA+058RXPxPg6fy4IWvTNh0E263XmFcJlSAwiGgFAW/dAiS6JXm" crossorigin="anonymous">
<script src="https://maxcdn.bootstrapcdn.com/bootstrap/4.0.0/js/bootstrap.min.js" integrity="sha384-JZR6Spejh4U02d8jOt6vLEHfe/JQGiRRSQQxSfFWpi1MquVdAyjUar5+76PVCmYl" crossorigin="anonymous"></script>
  </head>
  <body>
      <div class="bg"></div>
     <div class="bg-others">
    <div class="container">
      <h1 >Realtime GPS Tracker with Raspberry PI</h1>
        <center><hr style="height:2px; border:none; color:#ffffff; background-color:#ffffff; width:35%; margin: 0 auto 0 auto;"></center>
        <p>by SPARKLERS: We Are The Makers</p>
        <center><button class="btn btn-success col-sm-3" id="action">Start Tracking</button></center><br>
        <center><div id="map-canvas"></div></center>
    </div>
          </div>

    <script>
    window.lat = 37.7850;
    window.lng = -122.4383;

    var map;
    var mark;
    var lineCoords = [];

    var initialize = function() {
      map  = new google.maps.Map(document.getElementById('map-canvas'), {center:{lat:lat,lng:lng},zoom:12});
      mark = new google.maps.Marker({position:{lat:lat, lng:lng}, map:map});
    };

    window.initialize = initialize;

    var redraw = function(payload) {
      if(payload.message.lat){
      lat = payload.message.lat;
      lng = payload.message.lng;

      map.setCenter({lat:lat, lng:lng, alt:0});
      mark.setPosition({lat:lat, lng:lng, alt:0});

      lineCoords.push(new google.maps.LatLng(lat, lng));

      var lineCoordinatesPath = new google.maps.Polyline({
        path: lineCoords,
        geodesic: true,
        strokeColor: '#2E10FF'
      });

      lineCoordinatesPath.setMap(map);}
    };

    var pnChannel = "raspi-tracker";

    var pubnub = new PubNub({
      publishKey:   'YOUR_PUBLISH_KEY',
      subscribeKey: 'YOUR_SUBSCRIBE_KEY'
    });

    document.querySelector('#action').addEventListener('click', function(){
        var text = document.getElementById("action").textContent;
        if(text == "Start Tracking"){
            pubnub.subscribe({channels: [pnChannel]});
            pubnub.addListener({message:redraw});
            document.getElementById("action").classList.add('btn-danger');
            document.getElementById("action").classList.remove('btn-success');
            document.getElementById("action").textContent = 'Stop Tracking';
        }
        else{
            pubnub.unsubscribe( {channels: [pnChannel] });
            document.getElementById("action").classList.remove('btn-danger');
            document.getElementById("action").classList.add('btn-success');
            document.getElementById("action").textContent = 'Start Tracking';
        }
        });
    </script>
    <script src="https://maps.googleapis.com/maps/api/js?v=3.exp&key=YOUR_GOOGLE_API_KEY&callback=initialize"></script>
  </body>
</html>
Now to make this code work you need to change two things:
a. You need to add the publish and subscribe key in the code:
var pubnub = new PubNub({
publishKey:   'Your Publish key',
subscribeKey: 'Your Subscribe Key'
});
To get this publish and subscribe key:
1. you need toSign Up in PubNub [It’s free].
2. Then go to the Admin Dashboard to get your keys.
 3. Finally just copy-paste the keys in the code.
b. Now after this you need a Google map API key. To get this
1. Go to Google Cloud Console.
2. Search for “Maps JavaScript API” and enable that.
3. Go to credentials, make a credential and copy the API key.
4. Paste the API key in code:
<script src="https://maps.googleapis.com/maps/api/js?v=3.exp&key=YOUR_GOOGLE_API_KEY&callback=initialize"></script>
Now save this file with a .html file extension(i.e. map.html). As the Javascript code is small, I have written this inside the html file.
For the explanation of this code, you can watch my youtube video on this. Also, you can visit the official blog by PubNub JavaScript Geolocation Tracking with Google Maps API, where they have shown how to create basic geolocation tracking webpage with Google maps API.
To style this page, I have also applied some CSS, which you can find below:
body, html {
  height: 100%;
}
.bg {
  /* The image used */
  background-image: url('https://mdbootstrap.com/img/Photos/Others/images/91.jpg');
  filter: blur(1px);
  -webkit-filter: blur(1px);
  /* Full height */
  height: 100%;

  /* Center and scale the image nicely */
  background-position: center;
  background-repeat: no-repeat;
  background-size: cover;
}
.bg-others {
  background-color: rgb(0,0,0);
  background-color: rgba(0,0,0, 0.4);
  color: white;
  font-weight: bold;
  text-align: center;
  border: 3px solid #f1f1f1;
  position: absolute;
  top: 50%;
  left: 50%;
  z-index: 2;
  width: 80%;
  padding: 20px;
  transform: translate(-50%, -50%);
}
.hr1{
   color: white;
}
#map-canvas{
    width:720px;
    height:400px;
    border: 6px solid #056af7;
    box-shadow: 0 4px 8px 0 rgba(0, 0, 0, 0.2), 0 6px 20px 0 rgba(0, 0, 0, 0.19);
}
Save this file with the name “map.css” in the same folder, where you have saved the html file. Now open the html file in any browser and it will look like this:
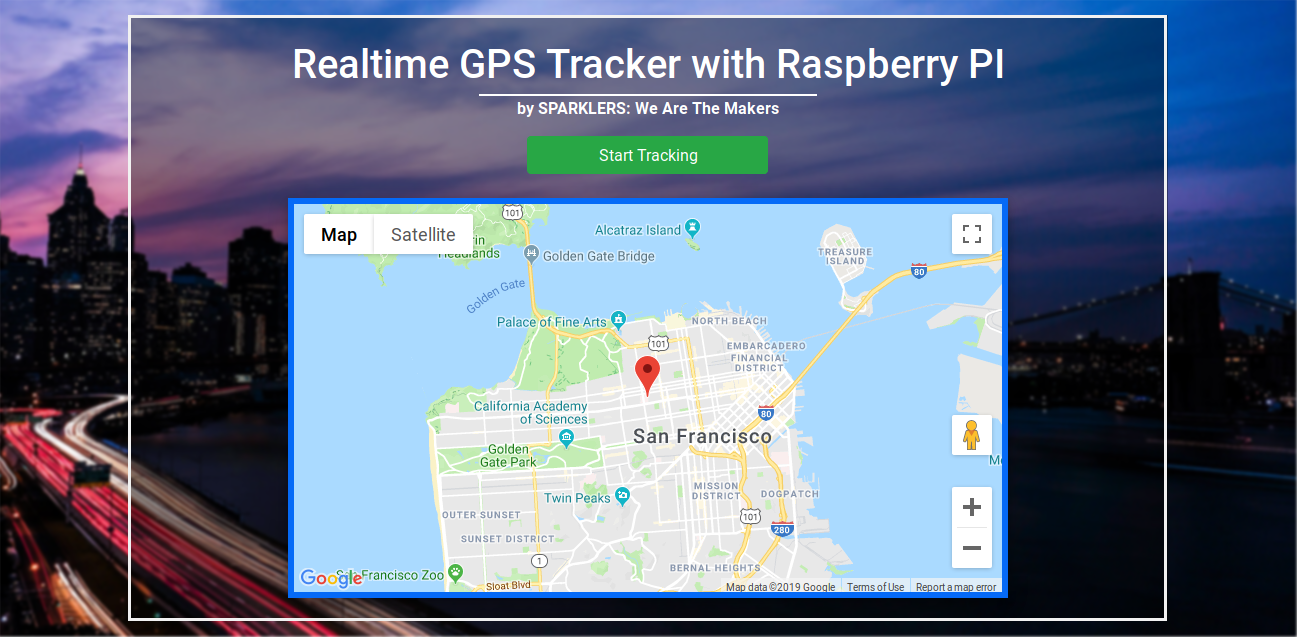
As you can see, the red marker is pointing to San Francisco, and this is because we have initialized the marker with the GPS coordinates of San Francisco.
window.lat = 37.7850;
window.lng = -122.4383;
You can change these coordinates with any GPS coordinates, and initially, the marker will point to that place.
Also, note the channel name used in the code as we need to use this in our python code:
var pnChannel = "raspi-tracker";
You can also change this name to anything you want, but the same name must be used in the python code.
Testing our Webpage:
Now our webpage is ready, so to check if it’s working properly we can do a small trick. We can add this Javascript code below at the end of our webpage code:
<script>
function newPoint(time) {
      var radius = 0.01;
      var x = Math.random() * radius;
      var y = Math.random() * radius;
      return {lat:window.lat + y, lng:window.lng + x};
        }
      setInterval(function() {
      pubnub.publish({channel:pnChannel, message:newPoint()});
      }, 500);
</script>
This snippet of code will generate a random coordinate (latitude and longitude) after every 500 milliseconds and publish that on the same channel so that the marker will automatically mark on some random points in the map and also create the path through those points. So now if you open the webpage in the browser, you will see a random path is generating in the map and from this, you can confirm that the map is working correctly.

b. Python Code for Raspberry Pi:
So in the last blog we have written this python code to print the GPS data in console:
import serial
import time
import string
import pynmea2

while True:
    port="/dev/ttyAMA0"
    ser=serial.Serial(port, baudrate=9600, timeout=0.5)
    dataout = pynmea2.NMEAStreamReader()
    newdata=ser.readline()

    if newdata[0:6] == "$GPRMC":
        newmsg=pynmea2.parse(newdata)
        lat=newmsg.latitude
        lng=newmsg.longitude
        gps = "Latitude=" + str(lat) + "and Longitude=" + str(lng)
        print(gps)
And the output was like this:
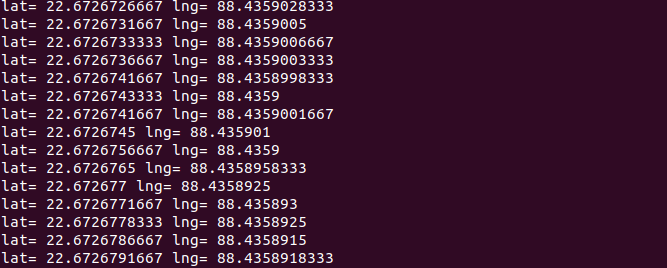
Now let’s modify this python code so that it can send data to the webpage.
We need a python library here to use PubNub in our python code. To install that library use this command:
pip install 'pubnub>=4.1.4'
Now we are ready to write the code:
import serial
import time
import string
import pynmea2
from pubnub.pnconfiguration import PNConfiguration
from pubnub.pubnub import PubNub
from pubnub.exceptions import PubNubException

pnChannel = "raspi-tracker";

pnconfig = PNConfiguration()
pnconfig.subscribe_key = "Your Subscribe key"
pnconfig.publish_key = "Your Publish key"
pnconfig.ssl = False

pubnub = PubNub(pnconfig)
pubnub.subscribe().channels(pnChannel).execute()

while True:
    port="/dev/ttyAMA0"
    ser=serial.Serial(port, baudrate=9600, timeout=0.5)
    dataout = pynmea2.NMEAStreamReader()
    newdata=ser.readline()

    if newdata[0:6] == "$GPRMC":
        newmsg=pynmea2.parse(newdata)
        lat=newmsg.latitude
        lng=newmsg.longitude
        try:
            envelope = pubnub.publish().channel(pnChannel).message({
            'lat':lat,
            'lng':lng
            }).sync()
            print("publish timetoken: %d" % envelope.result.timetoken)
        except PubNubException as e:
            handle_exception(e)
So here again you need to write the publish key and subscribe key. And also note we have used the channel name “raspi-tracker” here as we have used in the javascript code.
Now if we run this python code on Raspberry Pi, you will immediately see that the marker on the map will point to your current location.
And as you will move the device in different locations, the marker will also move and also will draw the path. Now, after I had a short walk with this device, this is how the map is looking like:
So as you can see, our live GPS tracking device and the webpage is ready. Now you can host this webpage in any webserver if you want to access this page from anywhere in the world. But if you don’t host it in any server, still it will work just by opening the HTML file in any browser.
The Author :

Like our facebook page and subscribe to our youtube channel so that you won't miss out future updates:
Follow us on facebook at : sparklers2018
For our latest videos subscribe us at : SPARKLERS:We Are The Makers